E24: Overhauling rear brake calipers
This post describes the overhaul of the rear brake calipers and parking brakes on an E24 M635CSi. I had my calipers sandblasted and painted by a company specializing in this type of work but you may also do this yourself.


4) DISCONNECT BRAKE LINE AND BRAKE PAD WEAR SENSOR
The rear right caliper involves a brake pad wear sensor. Pry the connector out of the metal clip and disconnect it.
Ideally the brake line is disconnected at the joint between the metal pipe and the small tube as in the picture below. However, due to dirt and corrosion, these connections tend to become very difficult to release. Start by cleaning the 11mm nut (the one sitting on the metal brake pipe) with a copper brush. Then spray a good dose of WD40 on it. To minimize the risk of damaging the nut, use a half-open 11mm wrench to turn the nut and an open 14mm wrench to hold the fitting on the hose side.
NOTE:
If the connection cannot be released, the alternative is to loosen the hose at the caliper side, then take away the caliper from the strut, and by turning the complete caliper disconnect it from the hose. This is however not preferred, since when reassembling the caliper, the hose may be slightly twisted.
If the 11mm nut is damaged after all, you'll have to replace the piece of brake pipe. These can be ordered at the right length.


Seal the brake pipe with a plastic bag to contain the spilling brake fluid.

5) REMOVE CALIPER AND DISK
Remove the two bolts with a 19mm socket. You probably need to apply some WD40 first.

By wriggling the caliper sideways and away from the disk, it can be removed.
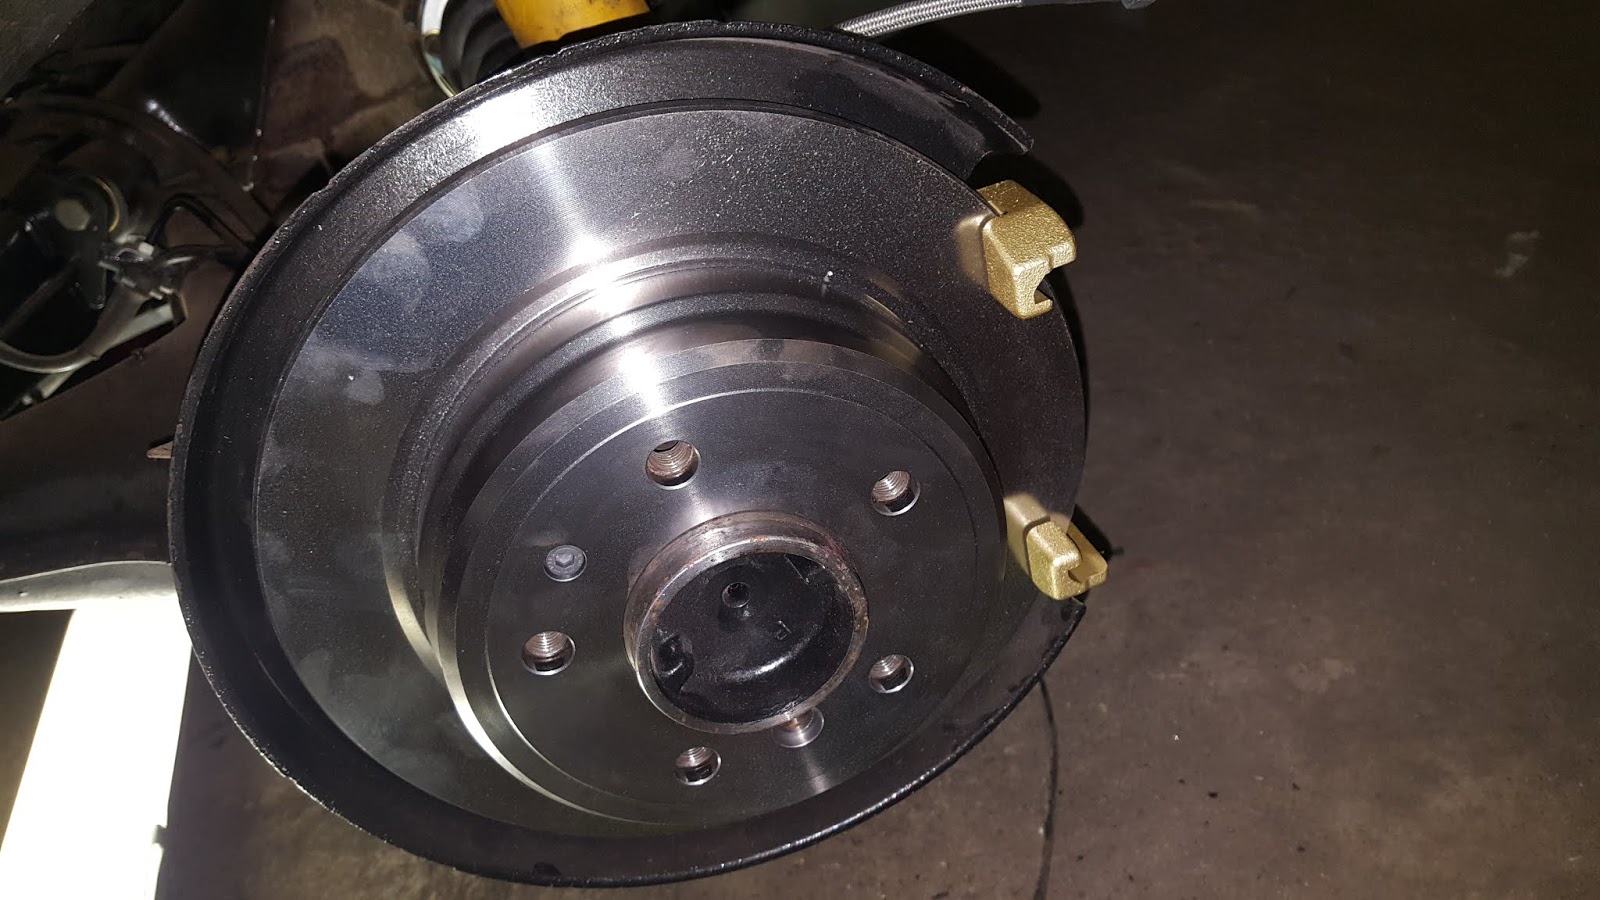
The disk can be removed by unscrewing the inner hex bolt with an Allen key. After that, the parking brake becomes visible. If you also want to overhaul the parking brakes, continue reading. Otherwise proceed with step 8)

6) REMOVE PARKING BRAKES
If you are only going to overhaul your disk brakes, proceed to step 8).
Remove the two tension springs that connect the brake shoes to each other. This can be done with a special pliers, or with a hook. Note the position of the springs, they are different! The upper spring i.e. the one sitting near the handbrake actuator is the wider of the two. The lower spring, sitting near the adjustment screw has a smaller diameter. Also note the position of the adjustment screw, the part with the star-wheel shall be closest to the floor. This applies to both the left and right side of the car, so the position is mirrored. In step 7) some pictures are shown to show the proper allocation.
With the tension springs removed, the shoes can be removed. Thus is done by turning the roll pins 90 degrees with an Allen key. The parking brake is operated through a Bowden cable, actuating an expanding lock. The expanding lock consists of two parts, one part slides over the other through a pivot, while the other part is connected to the Bowden cable through a pin. The first part can simply be taken off the pivot. The other part can be disconnected from the Bowden cable by pressing the pin out with a small screwdriver.
CAUTION!
The pin and pivot are very small and may drop out from the expansion lock. Store the parts together in a bag!


7) CLEAN AND INSTALL PARKING BRAKES
Clean and brush the expansion lock, tension springs and roll pins.
Optionally a repair kit can be ordered for less than 20 dollars, containing the springs and roll pins. Also clean the brake shoes or install new ones.
Before installation, check out the pictures below with the orientation of the different parts. The spring with the larger diameter needs to be placed on the upper side where the expansion lock is residing. The smaller spring goes to the lower position where the adjustment screw is residing. The star wheel of the adjustment screw is pointing towards the floor.


With respect to the expansion lock, in my case the left and right side were installed with different philosophies, so probably the orientation doesn't really matter, but I believe that the proper way is to install it such that the pivoting part is lowest.

Install the expansion lock by reconnecting it to the Bowden cable. Make sure the pivot is correctly placed in the middle of the punched hole. Slide the other part over the pivot. Then install the brake shoes with the rolling pins. Next install the adjustment screw. Finally install the two retension springs. This is a little cumbersome, in my case it worked best by inserting one end of the spring into the hole, and pulling the other side with a T-bar handle connected to a hook, until it was just resting in the other hole, and then smack it in with hammer and flat screwdriver.

8) OVERHAUL CALIPERS
Remove the brake pads. The outer one is only held by the carrier, the inner one is also clipped into the piston. To allow the caliper to float, it is guided by two bolts. Remove the plastic caps. Then use an Allen key to release the guiding bolts from the carrier. Remove the carrier.


It is held to the piston by a metal clamping ring. Remove it using a small screwdriver.


Pull the rubber cover off the piston.

Most manuals state that the piston can be removed using compressed air. Besides a compressor, this requires the use of a small piece of wood which shall protect the piston when it's blown out of the cilinder. I used an alternative method, using a standard 6 dollar grease gun. Often this tool comes equipped with a piece of hose and a junction that perfectly fits the hose that is still connected to the caliper.


Connect the hose to the caliper. Unscrew the tube from the grease gun, you'll only need the pumping part. Poor some (old) brake fluid into the lid of the grease gun and start pumping. The piston will slowly be pushed out of the cilinder. Check out the video below to see how this works out.
Clean the pistons, check for any wear. You may only polish the pistons with the finest grain sanding paper (P1000 or finer), and only to remove any dirt, not to lathe them!! If your pistons have too may marks of wear, they should be replaced!

You may clean the caliper with a steel brush, possibly aided by a drill. Use lots of gasoline to remove any dirt and grease from the caliper parts.

Next you may paint it with Hammerite. In my case I had the calipers sandblasted and painted by a company specializing in the renovation of brakes. As alternative to painting, they can also galvanize or powdercoat the parts.

9) INSTALL CALIPERS
The repair kit contains the seal ring that goes inside the cilinder, the dust cover and the clip to fasten it. You also need some Ate brake paste. Install the seal ring in the groove inside the cilinder. Apply a very thin layer of Ate brake paste on the cilinder wall, only the part between the bottom and the seal, not above the seal!

Gently push the piston into its cilinder dead straight. If the piston is not sliding smoothly it may be slanted.

Install the rubber dust protection sleeve by first pulling it over the piston, just below the collar. Next pull the rubber sleeve over the edge of the cilinder bore and lock it with the clamping ring.

Install the flexible brake hose to the caliper. I used the opportunity to install steel inforced brake lines.
Install the rubber sleeves that protect the guiding bolts. Install bleeder screw.

Install the brake disk onto the axle. I installed new disks but if yours are still fine you can reuse the old ones. Bolt the carrier onto the strut.

Install the brake pads into the caliper. The inner brake pad is clipped into the piston. Slide the caliper over the disk and carrier. Use an Allen key to install the guiding bolts that hold the caliper to the carrier. Connect the brake lines, and when applicable install the brake pad wear sensor. Don't forget to install the outer spring and the caps that go onto the guiding bolt bushings.

10) BLEED BRAKE SYSTEM
This is easiest with 2 persons, where one can open/close the bleeder screw and the other can operate the brake pedal. However, with the use of following ingenious tool it can also be done with 1 person... It's a standard medical bag for collection of all kinds of fluids.... If your 85-year old uncle happens to be hospitalized, you can probably sneak one of these bags out of his room.
Bleeding the system should start with the caliper that is furthest away from the brake fluid container, i.e. the rear right caliper. Connect the hose of the medical bag onto the bleeder screw (it fits exactly).
Open the bleeder screw. Poor some Dot 4 brake fluid into the container, and operate the brake pedal a couple of times until the fluid is escaping the caliper into the bag. Close the screw and operate the brake pedal some more times.


Open the screw again, and operate the pedal some more times. The escaping fluid is visible in the hose, and should not contain any bubbles. When a clean stream without bubbles is observed, lock the brake pedal in the down position (using a crowbar or something) and close the screw. Verify that the pedal is hard when operated after that.
Continue with the rear left brake, and finally the left front and right front brakes.

Job done, time for tea....

1) PREPARATION
- Repair kits (piston rings, dust covers, parking brake shoes, disks)
- Half-open 11mm wrench, open 14mm wrench (to disconnect brake lines)
- 19mm socket (to remove calipers)
- Large screwdriver (to remove brake pad retainer clip)
- Repair kits (piston rings, dust covers, parking brake shoes, disks)
- Half-open 11mm wrench, open 14mm wrench (to disconnect brake lines)
- 19mm socket (to remove calipers)
- Large screwdriver (to remove brake pad retainer clip)
- Allen keys (to remove disk M8 inner hex bolt and caliper guiding bolts)
- Copper brush (to remove dirt from the brake line connection)
- WD40
You may drain the brake fluid before starting the procedure. I did not, just sealed the brake lines with a plastic bag after disconnecting them. After reinstallation of the calipers, the brakes need to be bled anyway.
2) LIFT CAR
Jack up the rear of the car. Remove the wheel.
- WD40
You may drain the brake fluid before starting the procedure. I did not, just sealed the brake lines with a plastic bag after disconnecting them. After reinstallation of the calipers, the brakes need to be bled anyway.
2) LIFT CAR
Jack up the rear of the car. Remove the wheel.

3) REMOVE CLIP
Use a large screwdriver to remove the brake pad retainer clip by prying it out at the spot indicated by the arrow.

The rear right caliper involves a brake pad wear sensor. Pry the connector out of the metal clip and disconnect it.
Ideally the brake line is disconnected at the joint between the metal pipe and the small tube as in the picture below. However, due to dirt and corrosion, these connections tend to become very difficult to release. Start by cleaning the 11mm nut (the one sitting on the metal brake pipe) with a copper brush. Then spray a good dose of WD40 on it. To minimize the risk of damaging the nut, use a half-open 11mm wrench to turn the nut and an open 14mm wrench to hold the fitting on the hose side.
NOTE:
If the connection cannot be released, the alternative is to loosen the hose at the caliper side, then take away the caliper from the strut, and by turning the complete caliper disconnect it from the hose. This is however not preferred, since when reassembling the caliper, the hose may be slightly twisted.
If the 11mm nut is damaged after all, you'll have to replace the piece of brake pipe. These can be ordered at the right length.


Seal the brake pipe with a plastic bag to contain the spilling brake fluid.

5) REMOVE CALIPER AND DISK
Remove the two bolts with a 19mm socket. You probably need to apply some WD40 first.

The disk can be removed by unscrewing the inner hex bolt with an Allen key. After that, the parking brake becomes visible. If you also want to overhaul the parking brakes, continue reading. Otherwise proceed with step 8)

6) REMOVE PARKING BRAKES
If you are only going to overhaul your disk brakes, proceed to step 8).
Remove the two tension springs that connect the brake shoes to each other. This can be done with a special pliers, or with a hook. Note the position of the springs, they are different! The upper spring i.e. the one sitting near the handbrake actuator is the wider of the two. The lower spring, sitting near the adjustment screw has a smaller diameter. Also note the position of the adjustment screw, the part with the star-wheel shall be closest to the floor. This applies to both the left and right side of the car, so the position is mirrored. In step 7) some pictures are shown to show the proper allocation.
With the tension springs removed, the shoes can be removed. Thus is done by turning the roll pins 90 degrees with an Allen key. The parking brake is operated through a Bowden cable, actuating an expanding lock. The expanding lock consists of two parts, one part slides over the other through a pivot, while the other part is connected to the Bowden cable through a pin. The first part can simply be taken off the pivot. The other part can be disconnected from the Bowden cable by pressing the pin out with a small screwdriver.
CAUTION!
The pin and pivot are very small and may drop out from the expansion lock. Store the parts together in a bag!


7) CLEAN AND INSTALL PARKING BRAKES
Clean and brush the expansion lock, tension springs and roll pins.
Optionally a repair kit can be ordered for less than 20 dollars, containing the springs and roll pins. Also clean the brake shoes or install new ones.
Before installation, check out the pictures below with the orientation of the different parts. The spring with the larger diameter needs to be placed on the upper side where the expansion lock is residing. The smaller spring goes to the lower position where the adjustment screw is residing. The star wheel of the adjustment screw is pointing towards the floor.


With respect to the expansion lock, in my case the left and right side were installed with different philosophies, so probably the orientation doesn't really matter, but I believe that the proper way is to install it such that the pivoting part is lowest.

Install the expansion lock by reconnecting it to the Bowden cable. Make sure the pivot is correctly placed in the middle of the punched hole. Slide the other part over the pivot. Then install the brake shoes with the rolling pins. Next install the adjustment screw. Finally install the two retension springs. This is a little cumbersome, in my case it worked best by inserting one end of the spring into the hole, and pulling the other side with a T-bar handle connected to a hook, until it was just resting in the other hole, and then smack it in with hammer and flat screwdriver.

8) OVERHAUL CALIPERS
Remove the brake pads. The outer one is only held by the carrier, the inner one is also clipped into the piston. To allow the caliper to float, it is guided by two bolts. Remove the plastic caps. Then use an Allen key to release the guiding bolts from the carrier. Remove the carrier.

Next, remove the dustcover that protects the piston.

It is held to the piston by a metal clamping ring. Remove it using a small screwdriver.


Pull the rubber cover off the piston.

Most manuals state that the piston can be removed using compressed air. Besides a compressor, this requires the use of a small piece of wood which shall protect the piston when it's blown out of the cilinder. I used an alternative method, using a standard 6 dollar grease gun. Often this tool comes equipped with a piece of hose and a junction that perfectly fits the hose that is still connected to the caliper.


Connect the hose to the caliper. Unscrew the tube from the grease gun, you'll only need the pumping part. Poor some (old) brake fluid into the lid of the grease gun and start pumping. The piston will slowly be pushed out of the cilinder. Check out the video below to see how this works out.
Clean the pistons, check for any wear. You may only polish the pistons with the finest grain sanding paper (P1000 or finer), and only to remove any dirt, not to lathe them!! If your pistons have too may marks of wear, they should be replaced!

You may clean the caliper with a steel brush, possibly aided by a drill. Use lots of gasoline to remove any dirt and grease from the caliper parts.

Next you may paint it with Hammerite. In my case I had the calipers sandblasted and painted by a company specializing in the renovation of brakes. As alternative to painting, they can also galvanize or powdercoat the parts.

9) INSTALL CALIPERS
The repair kit contains the seal ring that goes inside the cilinder, the dust cover and the clip to fasten it. You also need some Ate brake paste. Install the seal ring in the groove inside the cilinder. Apply a very thin layer of Ate brake paste on the cilinder wall, only the part between the bottom and the seal, not above the seal!

Gently push the piston into its cilinder dead straight. If the piston is not sliding smoothly it may be slanted.

Install the rubber dust protection sleeve by first pulling it over the piston, just below the collar. Next pull the rubber sleeve over the edge of the cilinder bore and lock it with the clamping ring.

Install the rubber sleeves that protect the guiding bolts. Install bleeder screw.

Install the brake disk onto the axle. I installed new disks but if yours are still fine you can reuse the old ones. Bolt the carrier onto the strut.
Install the brake pads into the caliper. The inner brake pad is clipped into the piston. Slide the caliper over the disk and carrier. Use an Allen key to install the guiding bolts that hold the caliper to the carrier. Connect the brake lines, and when applicable install the brake pad wear sensor. Don't forget to install the outer spring and the caps that go onto the guiding bolt bushings.

10) BLEED BRAKE SYSTEM
This is easiest with 2 persons, where one can open/close the bleeder screw and the other can operate the brake pedal. However, with the use of following ingenious tool it can also be done with 1 person... It's a standard medical bag for collection of all kinds of fluids.... If your 85-year old uncle happens to be hospitalized, you can probably sneak one of these bags out of his room.
Bleeding the system should start with the caliper that is furthest away from the brake fluid container, i.e. the rear right caliper. Connect the hose of the medical bag onto the bleeder screw (it fits exactly).
Open the bleeder screw. Poor some Dot 4 brake fluid into the container, and operate the brake pedal a couple of times until the fluid is escaping the caliper into the bag. Close the screw and operate the brake pedal some more times.


Open the screw again, and operate the pedal some more times. The escaping fluid is visible in the hose, and should not contain any bubbles. When a clean stream without bubbles is observed, lock the brake pedal in the down position (using a crowbar or something) and close the screw. Verify that the pedal is hard when operated after that.
Continue with the rear left brake, and finally the left front and right front brakes.

Job done, time for tea....


Reacties
Een reactie posten